If you were in VB6 HelpContextID will be familiar for you (http://msdn.microsoft.com/en-us/library/aa267690(v=vs.60).aspx). In those sweet VB6 days all you had to do was:
Private Sub Form_Load ()
   App.HelpFile = "VB.HLP"
   Frame1.HelpContextID = 21004
   Text1.HelpContextID = 21001
   Form1.HelpContextID = 21005
End Sub
And each time you pressed the F1 button your application will have opened the .hlp file and show you the Help Topic corresponding to that ID. After migration from VB6 to WinForms Help you now have the HelpProvider.SetHelpKeyword http://msdn.microsoft.com/en-us/library/system.windows.forms.helpprovider.sethelpkeyword.aspx And you had to do something like:
internal System.Windows.Forms.HelpProvider HelpProvider1;
...
HelpProvider1.HelpNamespace = "sample.chm";
HelpProvider1.SetHelpKeyword(TextBox1, "1007.html");
HelpProvider1.SetHelpNavigator(TextBox1, HelpNavigator.Topic);
HelpProvider1.SetHelpKeyword(ListBox1, "1006.html");
HelpProvider1.SetHelpNavigator(ListBox1, HelpNavigator.Topic);
And all that seems nice. But, what can you do when you cross over to SilverlightjQuery15205164761650376022_1357918518660? Well, in general there are several systems that allow you to author your help files in html or convert your .hlp or .chm files to html, but how do you link your components to that help system in order to provide context-sensitive help???? Ok. So one of the possible solutions is very very simple. In general, the solution that I will show in this post is this: 1) First implement an attached property for adding a HelpKeyword to Silverlight components 2) Set the helpkeyword in the desired components 3) Provide logic that will open the appropiate help file. Ok. So let's implement a Silverlight Attached property. An attached propery is like adding a new property to your controls. This new attached property will be called Helpkeyword
using System;
using System.Windows.Shapes;
namespace System.Windows.Controls
{
    public class HelpProvider
    {
        public static readonly DependencyProperty HelpKeyword =
            DependencyProperty.RegisterAttached("HelpKeyword", typeof(string), typeof(HelpProvider), new PropertyMetadata(null));
        public static void SetHelpKeyword(UIElement element, string keyword)
        {
            element.SetValue(HelpKeyword, keyword);
        }

        public static string GetHelpKeyword(UIElement element)
        {
            return (string)element.GetValue(HelpKeyword);
        }
    }
}
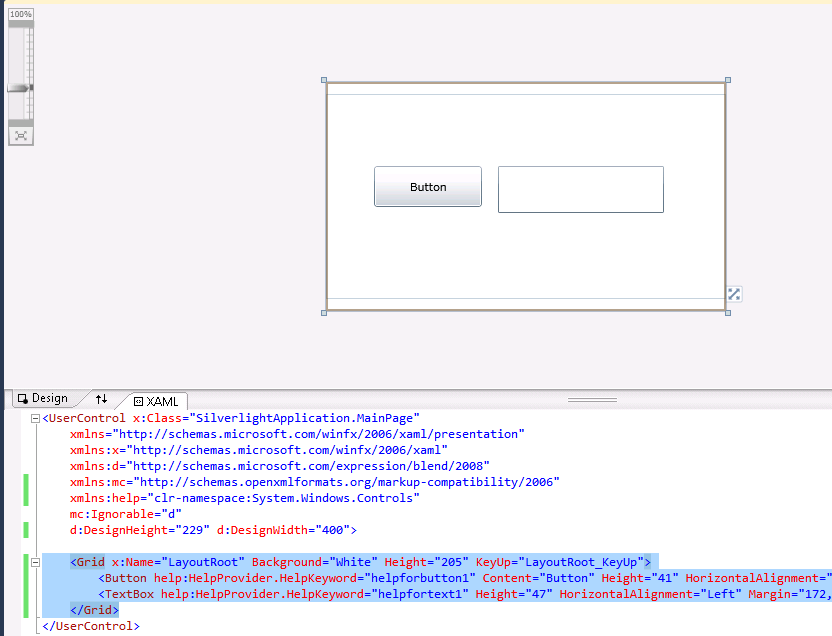
Ok. So once we have the attached property we have to use it, and set it on the code: To set it on the code we must add a namespace:
<UserControl x:Class="SilverlightApplication.MainPage"
    xmlns="http://schemas.microsoft.com/winfx/2006/xaml/presentation"
    ...
    xmlns:help="clr-namespace:System.Windows.Controls"
    mc:Ignorable="d"
    ....>
And apply the attribute to components
<Button help:HelpProvider.HelpKeyword="helpforbutton1" Content="Button" ...  />
<TextBox help:HelpProvider.HelpKeyword="helpfortext1" Height="47" ... />
So that almost everything, now we just need to trigger the appropiate logic, to do that we will add a KeyUp handler to the top most element, in this example a grid. NOTE: if Silverlight is running on the browser F1 is not an option. I just used F2 here as an example.
<Grid x:Name="LayoutRoot" Background="White" Height="205" KeyUp="LayoutRoot_KeyUp">
<Button help:HelpProvider.HelpKeyword="helpforbutton1" ...  />
<TextBox help:HelpProvider.HelpKeyword="helpfortext1" ... />
</Grid>
using System;
using System.Windows;
using System.Windows.Controls;
using System.Windows.Input;
using System.Windows.Browser;
namespace SilverlightApplication
{
public partial class MainPage : UserControl
{
public MainPage()
{
InitializeComponent();
}
private void LayoutRoot_KeyUp(object sender, KeyEventArgs e)
{
//check for the specific key. For now use F2 as the Help Shortcut
if (e.Key==Key.F2) {
var uielement = FocusManager.GetFocusedElement() as UIElement;
if (uielement!=null)
{
var keyword = HelpProvider.GetHelpKeyword(uielement);
var host = HtmlPage.Document.DocumentUri.Host;
var port = HtmlPage.Document.DocumentUri.Port;
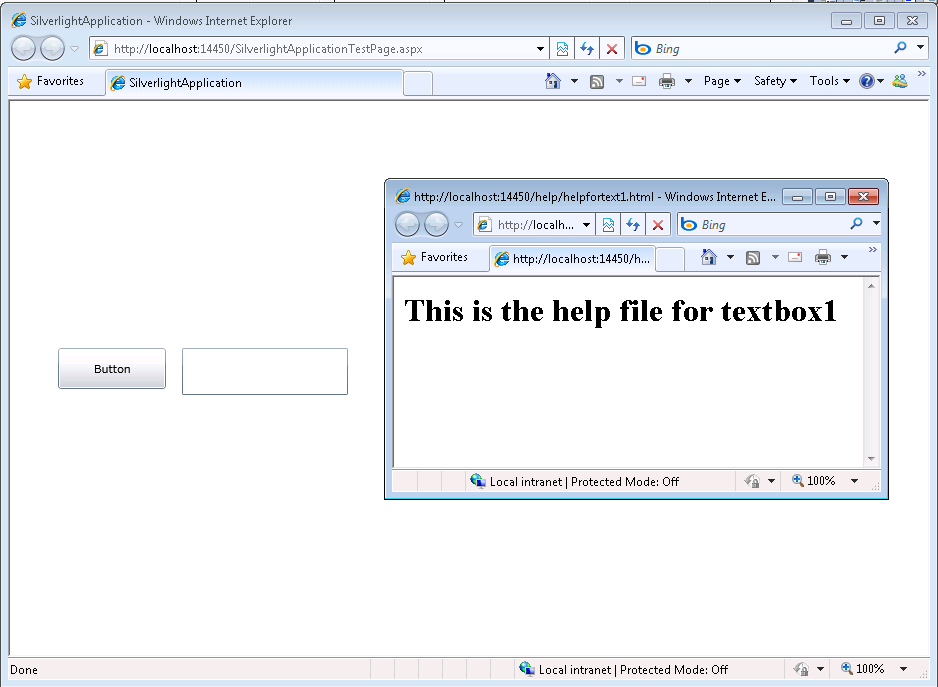
var url = string.Format("http://{0}:{1}/help/{2}.html", host,port,keyword);
HtmlPage.Window.Navigate(new Uri(url),"_blank");
}
} // else ignore the keystroke
}
}
}
This property can be used on the IDE:
On code
var uielement = FocusManager.GetFocusedElement() as UIElement;
if (uielement!=null) {
var keyword = HelpProvider.GetHelpKeyword(uielement);
}
This is an image of the application running.
And you can download the code from: CODE
If you have any questions or would like more info on Silverlight migration check www.silverlightmigration.com
Some time ago Artinsoft participated in the development of a book called “Upgrading Visual Basic 6.0 Applications”.
I quote from that book:
“The upgrade wizard is designed to upgrade Visual Basic 6.0 applications. For
projects written in Visual Basic versions 1.0 through 5.0, it is necessary that you first
upgrade them to Visual Basic 6.0 before upgrading to Visual Basic .NET. To upgrade
a project that was developed in a version earlier than Visual Basic 6.0, simply open
the project in the Visual Basic 6.0 IDE and save it. If Visual Basic 6.0 prompts you to
upgrade controls to Visual Basic 6.0, choose Yes. If the project contains Visual Basic
5.0 ActiveX controls, it is often best to replace these controls with Visual Basic 6.0
versions. This is because these controls use a different threading model than models
used by Visual Basic 6.0 controls. The earlier threading model is not supported in
Windows Forms.
For 16-bit projects written in Visual Basic versions 1.0 through 4.0, you may need to
make extra modifications to the application to convert it to Visual Basic 6.0.
VBX controls will not be automatically converted. You will also have to replace
Win16 Windows APIs with their Win32® counterparts.
Visual Basic versions 2.0 and 3.0 often require an extra step. Visual Basic 6.0 can only
open files in text format, whereas Visual Basic versions 2.0 and 3.0 support two file
formats: binary and text. Before upgrading these projects, ensure the entire applica-
tion is saved in text format by using the following procedure.
To convert Visual Basic 1.0 and 2.0 files to text format
1. On the File menu, click Save As.
2. In the Save dialog box, select the Save As Text check box.
Because Visual Basic 1.0 can only save files in binary format, all of these projects will
first need to be opened in Visual Basic 2.0 or 3.0 and then saved as text before they
can be converted to Visual Basic 6.0. After converting the project to Visual Basic 6.0,
you can begin the process of upgrading it to Visual Basic .NET.”
This book is available for free
from the MSDN