During a migration from ASP to ASP.NET one of the biggest hurdles is finding a way to deal with the include files.
ASP was a interpreted environment whether ASP.NET is compiled and this difference is very important because you need to find ways more natural in .NET to do some things you used to do in ASP.
For example in ASP you used to have a set of common functionality that was included in your files. What will you do with that?
For ASP ASP.NET in VB.NET is a lot easier. One of the things you can do is move all those common subs and functions to a Module.
Now if what you have is a ASP.NET Web Site, then just your new modules to the App_Code folder and voila your pages are now able to see that code.
For a ASP.NET Web Application is just a little differente. What you have to do is move your common variables, constants, subs and functions to a Module, but that is not enough to make that code reachable from your mark up, so you have two alternatives:
1. Add an %@import Namespace=”QualfiedNamespaces.Module1” statement for each of your modules.
2. Modify your web.config file and add under system.web something like:
<system.web>
              <pages>
                     <namespaces>
                           <add namespace="WebApplication1.Module1"/>
                     </namespaces>

              </pages>
That will add an implicit import for all your pages.
For C# it can be a little more complicated. Because you do not have modules like in VB.NET, what you can do is use extension methods, to have a similiar syntax.
In .NET Framework 2.0 the attribute configSource was added to several elements of the .NET config files so you could use external files.
Sadly those attribute are not available for the system.serviceModel.However I found this post that shows a interesting workaround.
You can modify your serviceModel file to look like this:
<configuration>

  <system.serviceModel>
    <services configSource="Services.config" >
    </services>

    <bindings configSource="Bindings.config">
    </bindings>

    <behaviors configSource="Behaviors.config">
    </behaviors>

  </system.serviceModel>

</configuration>
And then you can put your configuration settings in separate files like the following:
Behaviors.config
<configuration>

  <system.serviceModel>
    <services configSource="Services.config" >
    </services>

    <bindings configSource="Bindings.config">
    </bindings>

    <behaviors configSource="Behaviors.config">
    </behaviors>

  </system.serviceModel>

</configuration>
For more details see the full post by Pablo Cibraro
If you ever get an error like, it is an annoying situation where the web server is trying to use and old compilation of your aspx files.
The workaround I have is: rename web.config to stopweb.config.
Browse to the offending page URL it will return an error. After you receive the error rename stopweb.config to web.config
Browse to the offending page. This will force the server to compile the web pages.
And if it work the problem will now go away.
I you were looking for a way to do that just take a look at this post: http://weblogs.asp.net/whaggard/archive/2004/08/30/223020.aspx
Just notice that for this post you need to add this struct:
[StructLayout(LayoutKind.Sequential)]
public struct SHFILEINFO
{
public IntPtr hIcon;
public IntPtr iIcon;
public uint dwAttributes;
[MarshalAs(UnmanagedType.ByValTStr, SizeConst = 260)]
public string szDisplayName;
[MarshalAs(UnmanagedType.ByValTStr, SizeConst = 80)]
public string szTypeName;
};
In VB6 when you have an ActiveX Library it was very important to use
the BinaryCompatibility setting to make sure that your applications did not break after a change.
So let’s first introduce what is binary compatibility and how to accomplish that in .NET.
Binary Compatibility allows to make changes to your components or COM classes without recompiling
every application you've made that uses the component.
And why do you need it. Why compatibility breaks.
On lets see.
An ActiveX Control or DLL expose Public interfaces.
Those interfaces have all of the properties, methods, events, etc. that you've marked as Public.
In other words, everything you've added that shows in Intellisense while working outside of your component.
Now let's say you have create a class, with two Methods Method1 and Method2
When you compile, VB generates all the COM infraestructure you need for your component.
It defines a CoClass and an interface and an entry for each method.
For a vb class with two methods:
Sub Method1()

End Sub

Sub Method2()

End Sub
It will produce a typelib like:
// Generated .IDL file (by the OLE/COM Object Viewer)
//
// typelib filename: <could not determine filename>
[
  uuid(8ABA2C0C-7CCA-40CD-A944-56707566634A),
  version(1.0)
]
library Project1
{
    // TLib :     // TLib : OLE Automation : {00020430-0000-0000-C000-000000000046}
    importlib("stdole2.tlb");

    // Forward declare all types defined in this typelib
    interface _Class1;

    [
      odl,
      uuid(6B86684C-B3DD-4680-BF95-8DEE2C17AF5B),
      version(1.0),
      hidden,
      dual,
      nonextensible,
      oleautomation
    ]
    interface _Class1 : IDispatch {
        [id(0x60030000)]
        HRESULT Method1();
        [id(0x60030001)]
        HRESULT Method2();
    };

    [
      uuid(C71C7AB0-552A-4D5D-A9FB-AF33830A697E),
      version(1.0)
    ]
    coclass Class1 {
        [default] interface _Class1;
    };
};
As you can see in the typelib there are IDs associated to each coclass, interface and
methods. Those IDs are the ones use when you generate the .exe file for your application.
Now if you modify your Class to:
Sub Method3()

End Sub

Sub Method4()

End Sub

Sub Method1()

End Sub

Sub Method2()

End Sub
and you use No Compatibility the typelib after your changes will be:
// Generated .IDL file (by the OLE/COM Object Viewer)
//
// typelib filename: <could not determine filename>

[
  uuid(FE5C56C2-E03A-4DC0-994D-B68543C72A46),
  version(1.0)
]
library Project1
{
    // TLib :     // TLib : OLE Automation : {00020430-0000-0000-C000-000000000046}
    importlib("stdole2.tlb");

    // Forward declare all types defined in this typelib
    interface _Class1;

    [
      odl,
      uuid(A3032E1E-52FE-42E0-98FF-84A9DD4FD8C3),
      version(1.0),
      hidden,
      dual,
      nonextensible,
      oleautomation
    ]
    interface _Class1 : IDispatch {
        [id(0x60030000)]
        HRESULT Method3();
        [id(0x60030001)]
        HRESULT Method4();
        [id(0x60030002)]
        HRESULT Method1();
        [id(0x60030003)]
        HRESULT Method2();
    };

    [
      uuid(72721504-CC56-4BB9-9447-C7193FE8C02D),
      version(1.0)
    ]
    coclass Class1 {
        [default] interface _Class1;
    };
};
As you can see, now the ids for the methods, CoClass are different, so your applications will return errors like: Error 430 (Automation error, the component dies horribly) or Error 429 (can't create the object at all)
But if you instead used BinaryCompatibility then the typelib for your class will be:
// Generated .IDL file (by the OLE/COM Object Viewer)
//
// typelib filename: <could not determine filename>
[
  uuid(8ABA2C0C-7CCA-40CD-A944-56707566634A),
  version(1.1)
]
library Project1
{
    // TLib :     // TLib : OLE Automation : {00020430-0000-0000-C000-000000000046}
    importlib("stdole2.tlb");

    // Forward declare all types defined in this typelib
    interface _Class1;
    [
      odl,
      uuid(6E9C59C3-82D7-444C-92FB-01B49D91A2FF),
      version(1.1),
      hidden,
      dual,
      nonextensible,
      oleautomation
    ]
    interface _Class1 : IDispatch {
        [id(0x60030002)]
        HRESULT Method3();
        [id(0x60030003)]
        HRESULT Method4();
        [id(0x60030000)]
        HRESULT Method1();
        [id(0x60030001)]
        HRESULT Method2();
    };

    [
      uuid(C71C7AB0-552A-4D5D-A9FB-AF33830A697E),
      version(1.1)
    ]
    coclass Class1 {
        [default] interface _Class1;
    };

    typedef [uuid(6B86684C-B3DD-4680-BF95-8DEE2C17AF5B), version(1.0), public]
    _Class1 Class1___v0;
};
If you compare now the two typelibs you can see the Method1 and Method2 keep the same ids.
For each version a typedef is generated that will point to the last version. For example adding a Method5 will add new entry like:
    typedef [uuid(6B86684C-B3DD-4680-BF95-8DEE2C17AF5B), version(1.0), public]
    _Class1 Class1___v0;

    typedef [uuid(6E9C59C3-82D7-444C-92FB-01B49D91A2FF), version(1.1), public]
    _Class1 Class1___v1;
Well that is what binary compatibility does. Now how to achieve binary compatibility in .NET
Binary Compatibility in .NET
Achieving binary compatibility in .NET is really easy. You just need to give more information to
make explicit how your typelib information will be. I will follow an approach as the one I already explained in this post:
http://blogs.artinsoft.net/mrojas/archive/2010/06/23/exposing-c-classes-thru-interop.aspx
Lets take our previous example:
using System;
using System.Runtime.InteropServices;

namespace InteropExamples
{
    public class Class1
    {
        public void Method3()
        {
        }
        public void Method4()
        {
        }
        public void Method1()
        {
        }
        public void Method2()
        {
        }
        public void Method5()
        {
        }
    }
}
In previous posts I had recommended using partial classes and using interfaces to explicitly specify what you what to be seen in COM. This means you start up with something like:
  public partial class Class1
    {
        public void Method3()
        {
        }
        public void Method4()
        {
        }
        public void Method1()
        {
        }
        public void Method2()
        {
        }
    }

    [ComVisible(true)]
    public interface _Class1
    {
        void Method3();
        void Method4();
        void Method1();
        void Method2();

    }
    [ComVisible(true)]
    [ClassInterface(ClassInterfaceType.None)]
    [ComDefaultInterface(typeof(_Class1))]
    partial class Class1 : _Class1
    {
        #region _Class1 Members

        void _Class1.Method3()
        {
            Method3();
        }

        void _Class1.Method4()
        {
            Method4();
        }

        void _Class1.Method1()
        {
            Method1();
        }

        void _Class1.Method2()
        {
            Method2();
        }

        #endregion
    }
Now to make this code binary compatible then you have to make sure that the tlb file generated for your class is almost identical to that generated before. To acomplish that we must make sure that we your methods, interfaces and classes have the same guids and ids. Lets see how:
using System;
using System.Runtime.InteropServices;

namespace InteropExamples
{
    public partial class Class1
    {

        public void Method3()
        {
            System.Windows.Forms.MessageBox.Show("3 N");
        }

        public void Method4()
        {
            System.Windows.Forms.MessageBox.Show("4 N");
        }

        public void Method5()
        {
            System.Windows.Forms.MessageBox.Show("5 N");
        }


        public void Method1()
        {
            System.Windows.Forms.MessageBox.Show("1 N");
        }

        public void Method2()
        {
            System.Windows.Forms.MessageBox.Show("2 N");
        }
    }

    [ComVisible(true)] //This to make the interface Visible for COM
    [TypeLibType((TypeLibTypeFlags)((short)TypeLibTypeFlags.FHidden |
        (short)TypeLibTypeFlags.FDual |
        (short)TypeLibTypeFlags.FNonExtensible |
        (short)TypeLibTypeFlags.FOleAutomation))] //This to use the same flags as in previous tlb
    [Guid("9BAFD76D-8E6B-439C-8B6D-37260BFA3317")] //This is to make the class have the guid
    public interface _Class1
    {
        [DispId(0x60030000)]
        void Method1();
        [DispId(0x60030001)]
        void Method2();
        [DispId(0x60030002)]
        void Method3();
        [DispId(0x60030003)]
        void Method4();
        [DispId(0x60030004)]
        void Method5();


    }

    [ComVisible(true)] //This to make the class Visible for COM
    [ClassInterface(ClassInterfaceType.None)] //This is to make sure that we have control on interface generation
    [ComDefaultInterface(typeof(_Class1))] //To set default interface
    [ProgId("Project1.Class1")] //To set ProgId
    [Guid("C71C7AB0-552A-4D5D-A9FB-AF33830A697E")] //Maintain same Guid.
    partial class Class1 : _Class1, Class1___v0, Class1___v1
    {
        #region _Class1 Members

        void _Class1.Method3()
        {
            Method3();
        }

        void _Class1.Method4()
        {
            Method4();
        }

        void _Class1.Method1()
        {
            Method1();
        }

        void _Class1.Method2()
        {
            Method2();
        }

        #endregion


        #region Class1___v0 Members

        void Class1___v0.Method1()
        {
            Method1();
        }

        void Class1___v0.Method2()
        {
            Method2();
        }

        void Class1___v0.Method3()
        {
            Method3();
        }

        void Class1___v0.Method4()
        {
            Method4();
        }

        void Class1___v0.Method5()
        {
            Method5();
        }

        #endregion

        #region Class1___v1 Members

        void Class1___v1.Method1()
        {
            Method1();
        }

        void Class1___v1.Method2()
        {
            Method2();
        }

        void Class1___v1.Method3()
        {
            Method3();
        }

        void Class1___v1.Method4()
        {
            Method4();
        }

        void Class1___v1.Method5()
        {
            Method5();
        }

        #endregion
    }

    //This is to keep compatibility with old versions
    //we cannot generate a typedef so we will need to add all of the versions
    //for BinaryCompatibility
    [ComVisible(true)]
    [Guid("6B86684C-B3DD-4680-BF95-8DEE2C17AF5B")]
    [TypeLibType(TypeLibTypeFlags.FHidden)]
    public interface Class1___v0
    {
        [DispId(0x60030000)]
        void Method1();
        [DispId(0x60030001)]
        void Method2();
        [DispId(0x60030002)]
        void Method3();
        [DispId(0x60030003)]
        void Method4();
        [DispId(0x60030004)]
        void Method5();
    }

    //This is to keep compatibility with old versions
    //we cannot generate a typedef so we will need to add all of the versions
    //for BinaryCompatibility
    [ComVisible(true)]
    [Guid("4A7A3317-BF13-443E-9DB0-2C5EA21F00CA")]
    [TypeLibType(TypeLibTypeFlags.FHidden)]
    public interface Class1___v1
    {
        [DispId(0x60030000)]
        void Method1();
        [DispId(0x60030001)]
        void Method2();
        [DispId(0x60030002)]
        void Method3();
        [DispId(0x60030003)]
        void Method4();
        [DispId(0x60030004)]
        void Method5();
    }

}
Sadly in .NET you cannot use Interface Inheritance in COM. If there is interface inheritance YOU HAVE TO IMPLEMENT each interface. In the case of code that comes from VB6. VB6 just uses typedefs, so you really don’t know which methods belong to each version. So in the end all versions have all methods.
The other alternative to this method, is just to implement last version. And after generating the tlb, decompile it to an .IDL file add the typedefs and recompiled it. I explained something similar in this post:http://blogs.artinsoft.net/mrojas/archive/2010/05/17/interop-remove-prefix-from-c-enums-for-com.aspx
Ok. I hope this helps you to have an more clear idea of what Binary Compatibility is and how to do it in .NET. I am attaching some sample code. It show an ActiveX library that uses BinaryCompatibility and three version on an aplications that uses the different versions. And also a .NET class library that is equivalent to the VB6 one. HERE
Enjoy.
AutoCAD 2010 will not be supporting VBA.
Quoting
“If you utilize VBA macros in your work environment, they will no longer work unless the VBA module is installed on your system. “
“When you run a command that requires VBA, a message dialog box will be displayed stating that VBA is no longer installed with AutoCAD and directing you to a website where you can download the VBA module. “
And also you can see that Autodesk states: “Autodesk is evaluating how long VBA will be supported in Autodesk products in the future. Though supported in the AutoCAD 2010-based products, it may or may not be supported in future releases. Therefore, it is strongly recommended that VB developers develop all new code using VB .NET.”
VBA does not support 64bit systems in a native way.
But If you want some advice from the VB migration experts or help on your migration project from VBA to VB.NET or C# you can us contact Artinsoft Migration Services.
We build the VB Upgrade Wizard that shipped with Visual Studio and have been doing VB migrations for years.
During a migration from a FlexGrid to a DataGridView, we encountered a situation where the HorizontalScrollBar did not show.
I found many suggestions like setting a MinimumColWidth value for all columns, etc.
But it wasn’t until my friend Jesus added a line like:
mygrid.DockStyle = DockStyle.Fill
that the HorizontalScrollBar appear.
It might just be that the grid was too big for form but just for the record this is a possible solution.
In VB6 ActiveX-EXEs or ActiveX OLE Server where used for several
reasons. Sometimes it was performance (because it allowed you to run
your code in another process) and sometimes as way to share resources
between several applications, like connection information, database
connections, mainframe info, etc.
During migration some of this ActiveX-Exes can be migrated as simple
Assembly DLLs, but other require more attention. Specially if they have
global variables that hold state shared by several programs.
In that is your case what are your options then?
1. Convert those ActiveX-Exes to Windows Services.
This option is simple. You modify your migrated assembly to work as a Windows Service. The easier way to do that is:
a) Start Microsoft Visual Studio 2005\2008
b) Go to File\New…\Project… and Select Windows Service
That will generated code like:
using System;
using System.Collections.Generic;
using System.ComponentModel;
using System.Data;
using System.Diagnostics;
using System.Linq;
using System.ServiceProcess;
using System.Text;
namespace WindowsService1
{
public partial class Service1 : ServiceBase
{
public Service1() { InitializeComponent(); }
protected override void OnStart(string[] args) { }
protected override void OnStop() { }
}
}
c) Add a reference to the Remoting Assemblies: System.Runtime.Remoting;
d) Modify the previous code:
Add two using statements like:
using System.Runtime.Remoting.Channels.Http;
using System.Runtime.Remoting.Channels;
using System.Runtime.Remoting;
Add a simple event log for tracing:
private static EventLog evt = new EventLog(“Application”);
private static string SVC_NAME = “ActiveX Server Example Svc”;
And modify the OnStart and OnStop methods to look like:
protected override void OnStart(string[] args)
{
HttpChannel chnl = new HttpChannel(1234);
ChannelServices.RegisterChannel(chnl,true );
RemotingConfiguration.RegisterWellKnownServiceType(typeof(MyClass), “MyClass.soap”, WellKnownObjectMode.Singleton);
evt.WriteEntry(SVC_NAME + ” Started”);
}
protected override void OnStop() { evt.WriteEntry(SVC_NAME +” Stoppped”); }
Also make sure that MyClass extends MarshalByRefClass
2. Convert those ActiveX-Exes using the Artinsoft ActiveX migration helpers.
Sometimes, you need your migrated application to replicate some of
the original ActiveX EXE \OLE DLL VB6 characteristics. For example you
need your ActiveX-EXE to start just when the first instance is created
and to resemble the VB6 logic for Process creation\destruction.
For that purpose Artinsoft has created some helpers that our
migration tool is able to automatically use in the generated code if it
detects that this functionality is needed.
The code will then be changed from:
Dim myInstance As New MyProject.MyClass
To the following Helper method:
myInstance = MyProjectFactory.Create< MyProject.MyClass>(myInstance);
And destroy calls can be changed to the following Helper method:
myInstance= MyProjectFactory.Dispose<MyProject.MyClass >( myInstance);
The migration tool will modify your ActiveX-EXEs or OLE Servers to
be Windows EXE and the helper will then locate the assembly that
contains the desired Class, create an instance and initilize a Remoting
channel to the desired classes. Settings as SingleUse and MultiUse are
also taken care by the helpers.
3. Other possible alternatives are using WFC and COM+ that I will comment in another post.
To be able to catch popup windows and open them in your own window you
have to manage WebBrowser events like NewWindow2.
But how do you do that in WPF?
Well it isn’t really that difficult. These are the steps that you have to follow:
1. Add a COM reference to a reference to %windir%\system32\shdocvw.dll
2. Add a new CodeFile to your project. Lets say CodeFile1.cs And put this code:
using System;
using System.Runtime.InteropServices;
[ComImport, InterfaceType(ComInterfaceType.InterfaceIsIUnknown)]
[Guid("6d5140c1-7436-11ce-8034-00aa006009fa")]
internal interface IServiceProvider
{

[return: MarshalAs(UnmanagedType.IUnknown)]

object QueryService(ref Guid guidService, ref Guid riid);

}
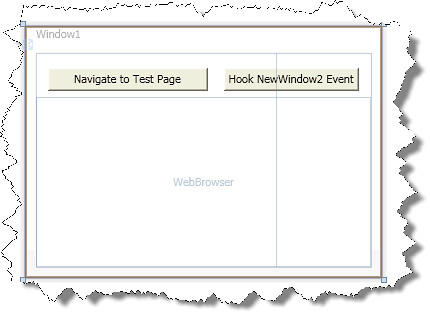
3. To make an easy example. Lets assume we have a very simple window like:
And in that form we need some code like this:
        private void button1_Click(object sender, RoutedEventArgs e)
        {
            Guid SID_SWebBrowserApp =
                          new Guid("0002DF05-0000-0000-C000-000000000046");
            IServiceProvider serviceProvider =
                (IServiceProvider)myWebBrowser.Document; //<—It seams that you need to
                                                         // navigate first to initialize this

            Guid serviceGuid = SID_SWebBrowserApp;

            Guid iid = typeof(SHDocVw.IWebBrowser2).GUID;
            //Here we will get a reference to the IWebBrowser2 interface
            SHDocVw.IWebBrowser2 myWebBrowser2 =
                   (SHDocVw.IWebBrowser2)
                   serviceProvider.QueryService(ref serviceGuid, ref iid);
//To hook events we just need to do these casts
SHDocVw.DWebBrowserEvents_Event wbEvents =
(SHDocVw.DWebBrowserEvents_Event)myWebBrowser2;
SHDocVw.DWebBrowserEvents2_Event wbEvents2 =
(SHDocVw.DWebBrowserEvents2_Event)myWebBrowser2; //Adding event handlers is now very simple
wbEvents.NewWindow +=
new SHDocVw.DWebBrowserEvents_NewWindowEventHandler(wbEvents_NewWindow); wbEvents2.NewWindow2 +=
new SHDocVw.DWebBrowserEvents2_NewWindow2EventHandler(wbEvents2_NewWindow2);
}
void wbEvents2_NewWindow2(ref object ppDisp, ref bool Cancel)
{
//If you want make popup windows to open in your own window
// you need to assign the ppDisp to the .Application of
// the WebBrowser in your window
            Window1 wnd = new Window1();
            wnd.Show();
            //Just navigate to make sure .Document is initilialized
            wnd.myWebBrowser.Navigate(new Uri("about:blank"));
            Guid SID_SWebBrowserApp = new Guid("0002DF05-0000-0000-C000-000000000046");
            IServiceProvider serviceProvider = (IServiceProvider)wnd.myWebBrowser.Document;

            Guid serviceGuid = SID_SWebBrowserApp;

            Guid iid = typeof(SHDocVw.IWebBrowser2).GUID;

            SHDocVw.IWebBrowser2 myWebBrowser2 = (SHDocVw.IWebBrowser2)serviceProvider.QueryService(ref serviceGuid, ref iid);

            ppDisp = myWebBrowser2.Application;
        }

        void wbEvents_NewWindow(string URL, int Flags, string TargetFrameName, ref object PostData, string Headers, ref bool Processed)
        {
            MessageBox.Show(URL);
        }

        private void button2_Click(object sender, RoutedEventArgs e)
        {
            myWebBrowser.Navigate(new Uri("file://D:/MyProjects/ExtendedBrowserExample_v2/test0.htm"));
        }
Now you can manage your popupwindows:

You can download the test application from HERE
Well recently Kingsley has point me to a lot of useful links to improve the ExtendedWebBrowser. However he found another detail. When in Javascript you do something like a:
window.open(‘url’,’window’,’width=200;height=300’);
Those width and height settings were not being considered in the new window. I researched for I while until I found this great link:
So basicly I follow the sugested code and added logic in my EventSink class:
        public void WindowSetLeft(int Left)
        {
            ///Should I calculate any diff?
            _Browser.Parent.Left = Left;

        }

        public void WindowSetTop(int Top)
        {
            _Browser.Parent.Top = Top;

        }

        public void WindowSetWidth(int Width)
        {
            int diff = 0;
            diff = _Browser.Parent.Width - _Browser.Width;
            _Browser.Parent.Width = diff + Width;

        }
        public void WindowSetHeight(int Height)
        {
            int diff = 0;
            diff = _Browser.Parent.Height - _Browser.Height;
            _Browser.Parent.Height = diff + Height;

        }
So now when the window opens it takes the specified width, heigth, left and top.
As always
HERE IS THE UPDATED CODE